To winterize sprinklers, shut off the water to the system, drain the backflow preventer and any exposed parts, and turn off the controller. Do it before the first hard freeze. Water left in a valve, fitting, or pipe expands as it turns to ice and can crack the part. That damage usually shows up in spring, when the system runs for the first time and starts leaking.
Inspection Gator has inspected homes across Northeast Texas, Southwest Arkansas, and Southeast Oklahoma since 2008, and sprinkler systems are part of that work. This guide covers the steps, the right timing, whether you need an air compressor, and when to call a pro.
How to Winterize Sprinklers Step by Step
Most home sprinkler systems take about an hour to winterize with a few basic tools. The goal is simple. Stop new water from entering the system, then get the water that is already inside out of the parts most likely to freeze.
Gather these first:
- Your system’s manual or the installer’s paperwork, if you have it
- A flathead screwdriver and a small adjustable wrench
- Foam pipe insulation or an insulated backflow cover, plus tape
- Eye protection and work gloves
- A bucket or old towels for the shutoff area
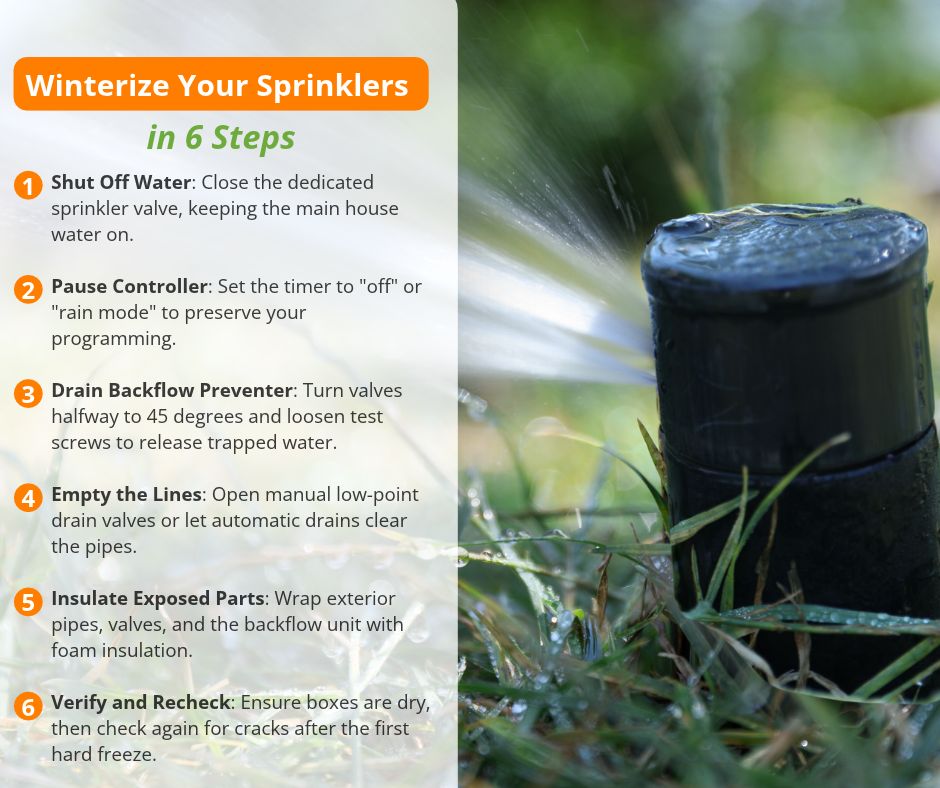
1. Turn Off the Water to the Sprinkler System
Find the shutoff valve that feeds your sprinklers. It is often in a valve box near the water meter, near the backflow preventer, or in a garage or crawl space. On a ball valve, turn the handle so it sits crosswise to the pipe. On a gate valve, turn the wheel clockwise until it stops.
Make sure you are closing the sprinkler line and not the main line to your house. If you are not sure which valve is which, check the installer’s paperwork before you turn anything.
2. Turn Off the Controller
Set the controller to “off” or “rain mode,” so it does not try to run zones with the water off. Check your manual first. Most controllers keep their programs this way, so you will not need to start over in spring.
3. Drain the Backflow Preventer
The backflow preventer is the above-ground device where the sprinkler line meets your home’s water supply. It sits outside, it costs more to replace than most other parts, and it is often the first part to crack in a freeze.
Turn the two valves on the device to a halfway position, about 45 degrees. Then open the small test cock screws with a flathead screwdriver so the water drains out. Leave them in that position for the winter. Designs vary, so follow your manufacturer’s instructions if they differ.
4. Drain the Lines
Systems drain in one of three ways. Check which one you have.
- Manual drain valves sit at the low points of the lines, often in small buried boxes. Open each one and let it drain. Your manual will tell you whether to leave them open or close them afterward.
- Automatic drain valves open by themselves when the water pressure drops. Give them 30 to 60 minutes after you shut off the water. Some water can stay behind in the valves and heads.
- Check valves in the sprinkler heads can hold water in the line. If your heads have them, pull each head up so the water can run out.
With the water off, you can also run each zone from the controller for a few seconds. That releases pressure and helps the drains work.
5. Insulate Exposed Parts
Wrap above-ground pipes, the shutoff valve, and the backflow preventer with foam insulation or an insulated cover. Secure it with tape. Exposed parts freeze first, so this step is worth the few minutes it takes.
6. Do a Final Check
Walk the yard. Look for standing water in valve boxes, and confirm the backflow preventer is dry. After the first freeze of the season, check everything again for leaks or cracks. Finding a problem in November is easier than finding it in April.
Should You Blow Out Your Sprinklers?
In most of Texas, a full air blowout is not required, and many systems are not built for one. Texas A&M AgriLife’s School of Irrigation says that for most of Texas, three steps protect a system from light to mild freezes: turn off the controller, shut off the water supply, and drain the above-ground parts such as the backflow preventer. It also notes that most Texas landscape systems are not designed for a blowout.
Our service area also includes Southwest Arkansas and Southeast Oklahoma, where freezes can run colder and last longer. If your system has a blowout port, or your installer recommends one, a blowout gives the most complete protection.
| Method | Best for | Watch out for |
| Shutdown plus backflow drain (steps 1 to 3 and 5) | Mild freezes, most Texas systems | Water can remain in valves and heads |
| Manual or automatic drains | Systems with drains at the low points | Drains can stick or clog, and some water stays behind |
| Air blowout | Systems built for it, colder areas | Too much pressure can crack pipes and fittings |
If your system is built for a blowout, keep these points in mind:
- Use a compressor that can keep up with your largest zone. A small garage compressor often cannot.
- Keep pressure within your pipe limits. Irrigation manufacturers and university extension guides commonly cap it at about 50 psi for polyethylene pipe and 80 psi for PVC, and many guides run lower. Colorado State University Extension has a home sprinkler winterizing guide that covers compressor sizing.
- Close the valves to the backflow preventer first so air does not push through it.
- Start with the zone farthest from the compressor, then work your way closer.
- Run each zone for 2 to 3 minutes, until only air and mist come out. Two or three short cycles work better than one long one.
- Wear eye protection and never stand over a sprinkler head while air is running.
Not sure what your system is built for? During a home inspection, our inspectors operate the sprinkler system and check the heads, piping, and backflow protection. You can see what we check on our home inspection page.
When to Winterize Sprinklers
Winterize before the first hard freeze. A good target is a week or more ahead of the first one in the forecast. A hard freeze is generally a night when temperatures drop to about 28°F or lower and stay below freezing long enough to freeze plants and standing water.
In our area, hard freezes usually start showing up in late fall and winter. If a freeze is forecast and you have not winterized yet, do not panic. Exposed parts freeze first. Buried lines have some protection from the soil, but they are not immune. Cover the backflow preventer and any above-ground pipe with a blanket or old towels until you can finish the job.
While your system is still running, take a look at our guide on irrigation run times to dial in your last few waterings of the season.
Mistakes That Cause Freeze Damage
Most freeze damage comes from a few repeat mistakes.
- Closing the backflow valves all the way. Water gets trapped and can split the valve. Leave them at 45 degrees.
- Skipping the backflow preventer. It is above ground, so it is the part most exposed to a freeze.
- Too much air pressure during a blowout. High pressure can crack the pipes you are trying to protect.
- Missing a zone. Count your zones at the controller and check them off one by one.
- Forgetting the pump or the drip lines. If your system runs from a well or pump, shut off power to the pump and drain it per its manual. Drip lines, filters, and pressure regulators hold water too.
- Waiting for the forecast to scare you into it. A cold snap in the forecast is a bad time to look for your shutoff valve.
How an Irrigation Inspection Could Help
A sprinkler system inspection, also known as an irrigation system inspection, checks that your system works and finds problems before they get expensive. At Inspection Gator, the inspector runs the system through its normal controls and tests how it operates. The focus is on broken heads, the piping that connects them, and backflow protection. You can see how this fits with our other services on the home inspection page.
Typical checks include:
- The controller. Does each zone start, run, and shut off the way it should?
- Sprinkler heads. Look for broken, clogged, sunken, or crooked heads, and heads that spray the house instead of the lawn.
- Coverage. Dry patches and soggy spots often point to a head, nozzle, or pressure problem.
- Piping and valves. Wet ground, geysers, or low pressure can mean a leak or a stuck valve.
- The backflow preventer. It should be in place, intact, and free of cracks and leaks. It also protects your drinking water, so it matters beyond freezing.
Why fall is a good time: An inspection before you winterize lets you fix a cracked head or a leaking valve before the freeze makes it worse. An inspection in spring, after you turn the system back on, shows whether winter damaged anything.
What an inspection does not do: An inspector finds and documents problems. A licensed irrigator makes the repairs, and also handles design changes and a full irrigation audit. That split keeps the report honest. The inspector has nothing to sell you but information.
Related Questions to Explore
- Do I need to winterize my sprinklers in Texas? Usually, yes, at least the basic shutdown. Many Texas systems do fine with the simple steps instead of a full blowout. Skipping everything is a gamble, because the backflow preventer sits above ground and can crack in one hard freeze.
- When should I winterize my sprinkler system? Do it before the first hard freeze, and ideally a week or more ahead of one. Keep the system running while your grass is still growing, then shut it down once nights stay close to freezing. Our irrigation run time guide can help with those last waterings.
- Can I winterize sprinklers without an air compressor? Yes. Shutting off the supply, turning off the controller, and draining the backflow preventer and low-point drains remove most of the water. Some water can stay in valves and heads, which is why pros blow out systems that are built for it.
- What happens if I don’t winterize my sprinkler system? Water left in the lines, valves, or backflow preventer can freeze, expand, and crack the part. You often find out in spring through leaks, wet spots, low pressure, or broken heads. A leak near the house also keeps soil wet next to the slab, which is worth knowing about if you have seen foundation cracks.
- How much does it cost to winterize a sprinkler system? National guides commonly put professional winterization at roughly $60 to $150, depending on the number of zones and the method. Doing it yourself costs little beyond insulation. A cracked backflow preventer or valve costs far more to replace.
- What PSI is safe for blowing out sprinklers? Stay within your pipe’s limit. A common ceiling is about 50 psi for polyethylene pipe and 80 psi for PVC, and many guides use lower numbers. Check your system’s manual or ask your installer, because exceeding the limit can crack pipes and fittings.
When to Call a Professional
Call a licensed irrigator if you cannot find your shutoff or drain valves, your system has no drains or blowout port, or it runs from a pump or well. A pro is also a good call if you have a lot of zones, or if last season’s leaks, geysers, or broken heads never got fixed.
Buying or selling a home with a sprinkler system? Ask your inspector to run it. Our inspectors test the zones and look at broken heads, piping, and backflow protection as part of a home inspection. That way, you know what you are getting before the first freeze finds the problem for you. Inspection Gator serves buyers, sellers, and homeowners across our service area, and you can book online any time.
Conclusion
Winterizing sprinklers takes about an hour and can save you a spring repair bill. Keep three things in mind:
- Shut off the water and the controller, and drain the backflow preventer, before the first hard freeze.
- Pick the method that fits your system. Most Texas systems need the basic shutdown, and colder areas may need a blowout.
- Check your system again after the first freeze.
Want a professional look at your sprinklers, backflow protection, and the rest of your home’s exterior? Schedule a home inspection with Inspection Gator.